
Model making for beginners can be time consuming, more so when you don’t have much of an idea as to what you are doing, but when you do you’ll soon realise just how important the equipment (and the lack thereof) decreases the quality of your models. From conceptualising proposal ideas to the final completion (I say completion but we all know that no project really ends it just grows in your head with time), model making is a key thinking process that is by far the most tangible visual for non-architecture students. So, with that being said, your models are just as great as your tools so here is a list of the few essentials to keep you going on your journey to making greater models.
1. G R E Y B O A R D
Like using sheets of paper, this is by far one of the most handy materials you’ll come across. But most important it is great for both conceptual models and final models. Coming in a range of thickness makes it easier for you to decide what to do with them. The foundations must be strong for an building and that goes for the grey boards too. I would stick to 2mm for base of your models, many because if you use it for the main body of your model it will both be a lot more time consuming to cut but also makes the model heavier overall. For the main body of your model I would stick to 1mm, this is easier to cut things out like stairs. Usually when buying grey board I tend to buy the larger sizes (A1/A2) it tends to be cheaper especially when you either need to travel to the art store because you’ll never not need to use it. Not all grey board is of the same colour, which isn’t a problem entirely however, unless intended you want to keep everything the same if you are not highlighting a particular aspect within your model. Most of the time the thicknesses vary, from store to store but as long as you have two distinctive thicknesses you’ll be ready for any given task.
You will come across a variation of materials to use from, from white card, to black card and brown card to grey board. What I find ideal with grey board is that it helps with projecting realistic conditions of light, the forms and shapes are allowing you to project internal conditions (and sometimes external if we are talking about mass models) So although I would encourage you to use grey board, as long as you are using one unified colour (like white card and kraft board which looks like regular cardboard) you can still manage to create great models especially when it is reflective of certain conditions and material elements within your work.

Cardboard… Grey board… brown board
Grey board tends to be more accessible and available in most art stores so sticking to just one material for the time being will allow you to develop models that are better made because eventually you’ll become familiar with the best ways to use it.
2 . C U T T I N G M A T
These are great for many reasons, but you’ll come to realise it is the thing that will save you being told off. And yes, you’ll need more than one for many reasons. Unlike most materials the larger the mat, the more expensive it becomes but bare with me.
Using a cutting mat of A1 is just as handy as having an A3/A4/A5. For instance, cutting larger sheets of grey board into more manageable pieces to work with is primarily why you’ll need a large cutting mat. It is great for group work because most of the time someone (and that might be you) will forget theirs. It isn’t as portable but being group friendly makes it worth living in the studio you work in. If you want a portable cutting mat, well then I guess you’ll want to have one that fits into your bag and just like I mentioned in the previous article, A4 tends to win for the most practical size for absolutely everything.

A4 Cutting Mat and A1 Cutting Mat
When you first come across them in a art shop you’ll soon realise that there are a lot of different cutting mats out there. You want something that lasts but also something that helps cutting materials easier. Most of the time, cutting mats come with measurements and squares engraved already on them, these will allow to cut straight and keep a consistency in your model pieces. But which one? The green ones or the transparent ones? I actually stuck to the green ones but what I soon realised was that the cutting mats that only had one side engraved generally only had one cutting side (crazy right?) Now I know this isn’t so much of a big deal but when you really just want to get on with making a model having it double sided is nice to have. Personally, I ended up buying a cutting mat that has a double side in A4, mainly because both sides had a squares that could guide me (I’d like to think that somehow I’m having more cutting room even if it is smaller than my other single sided ones)
Now looking at the features of cutting mats, if you have more room in your budgeting to buy a double sided cutting mat with measurements go for it, but what I found is that it was more useful at A4 (and cheaper) as I would make more use out of it. And that is what you want at the end of the day. Something that you’ll constantly be using when you make your models.
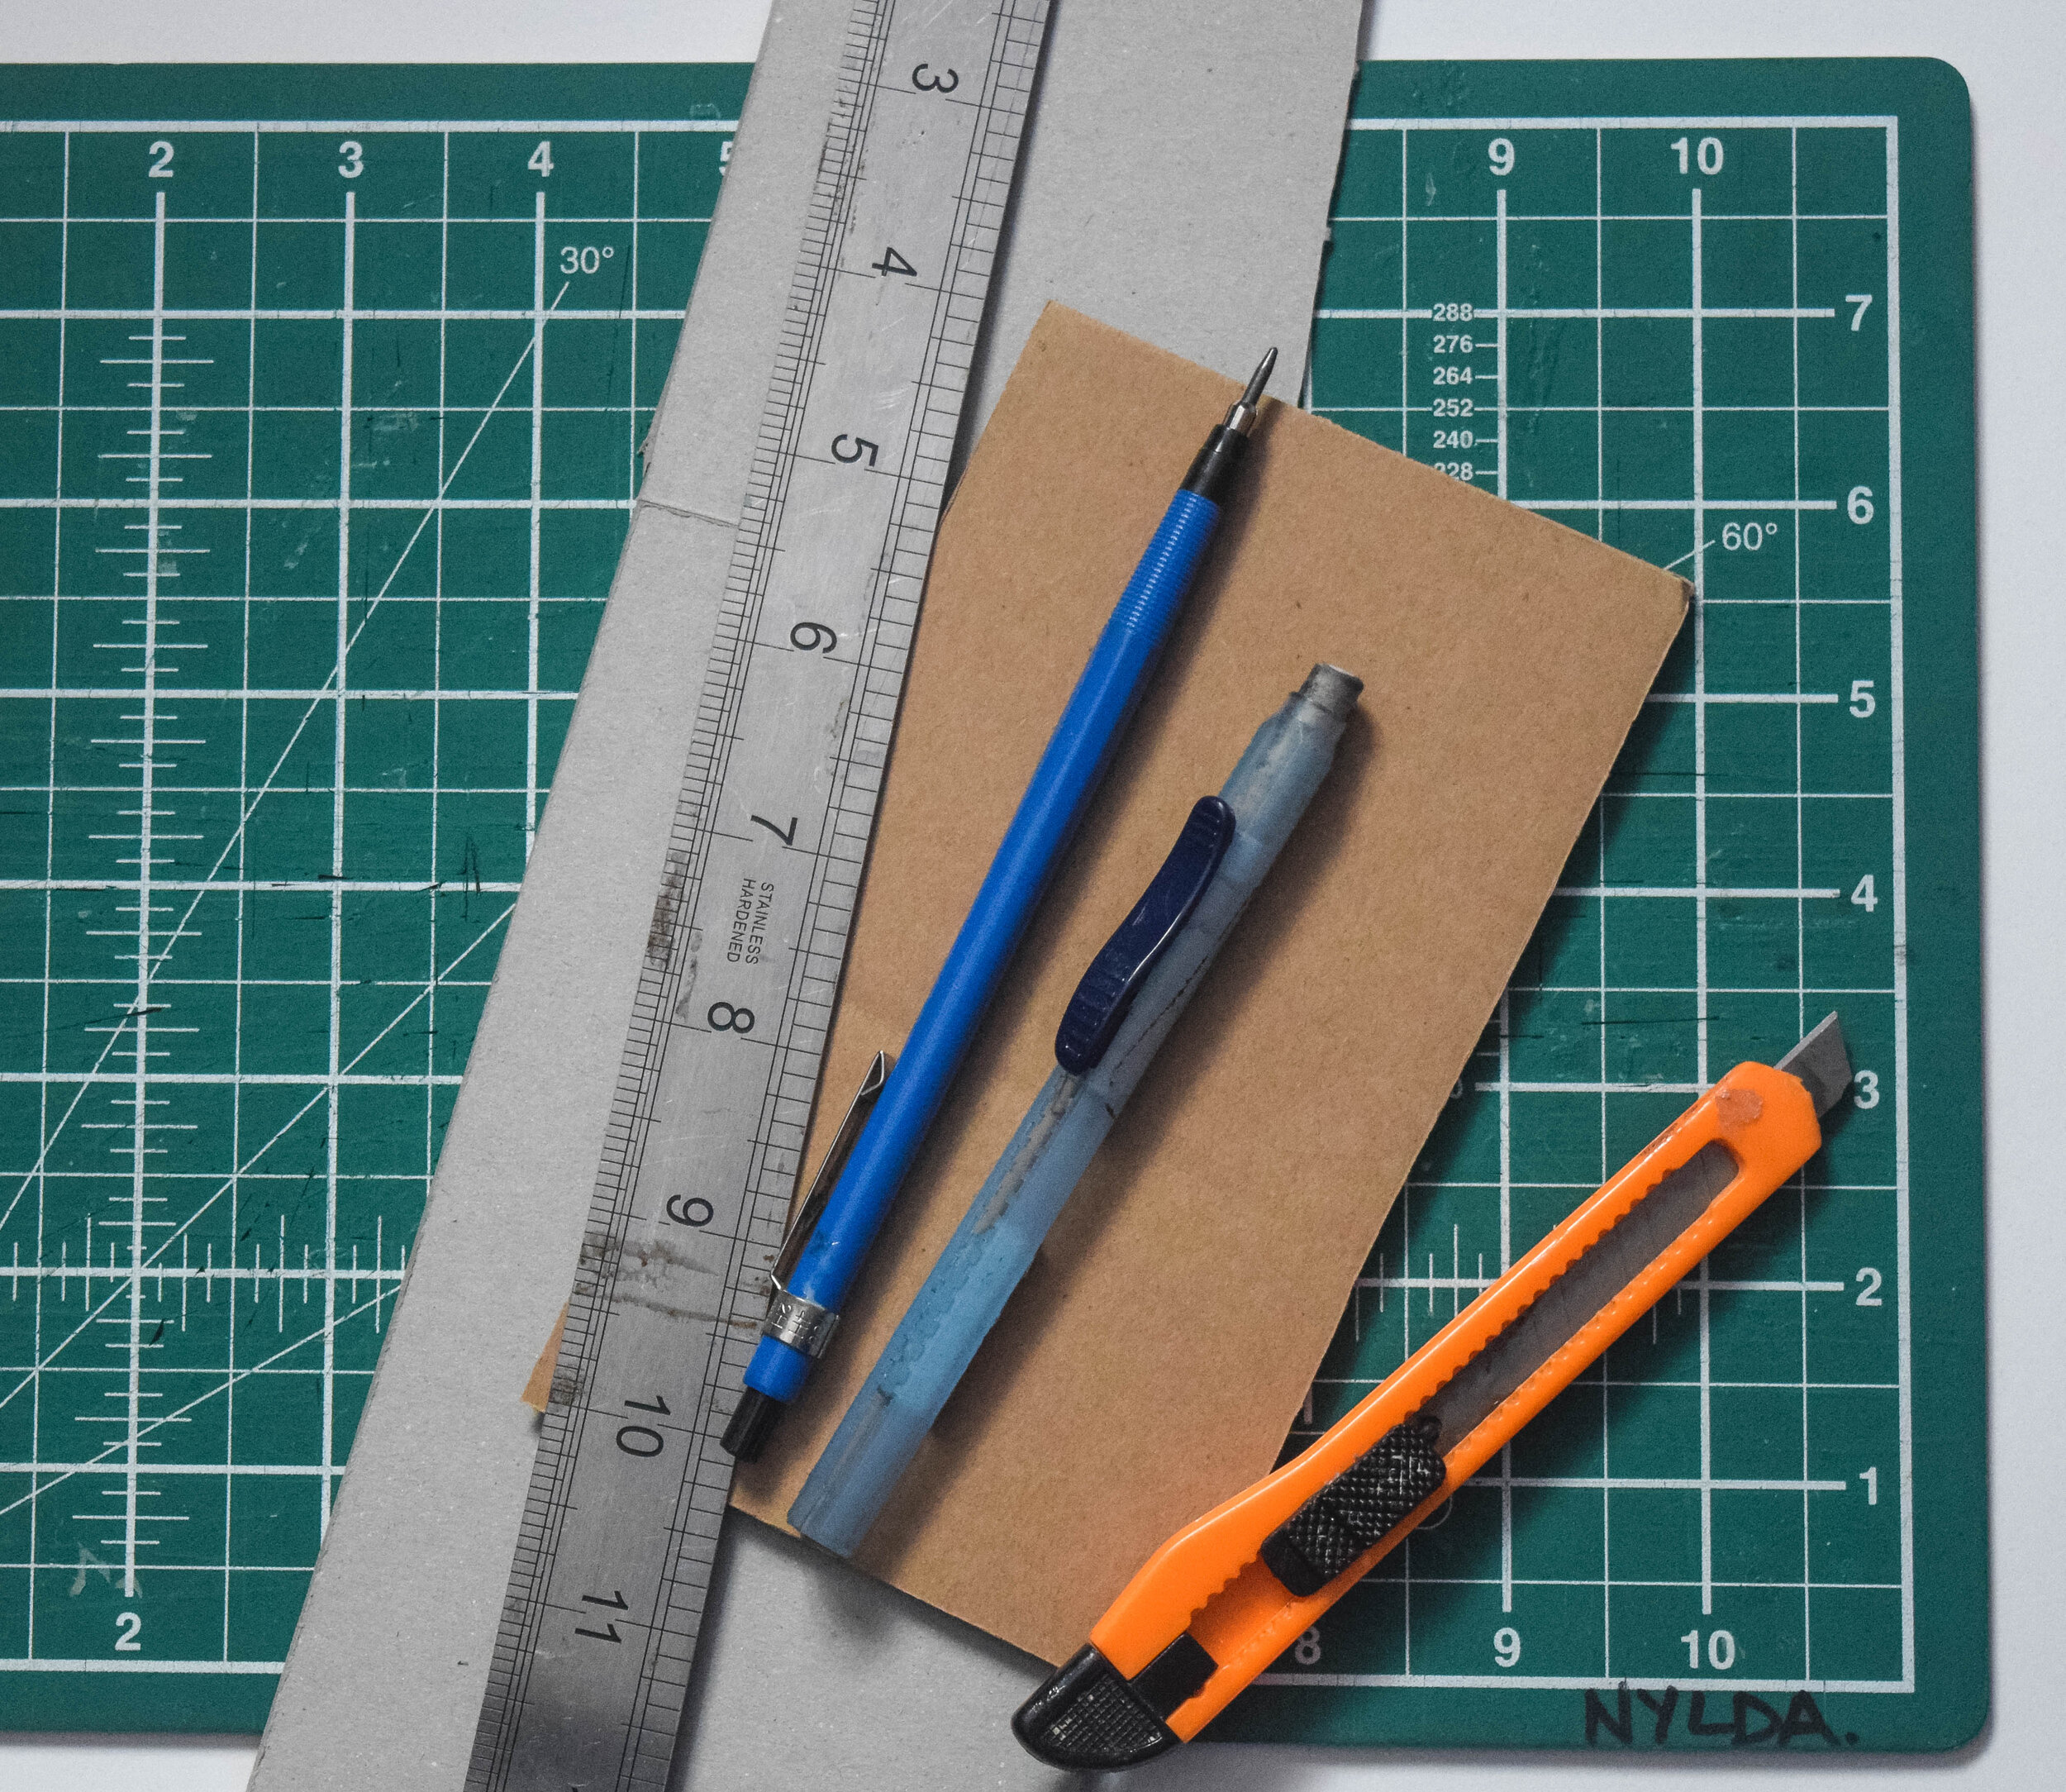
3. C U T T I N G K N I V E S
You’ll most probably be familiar with scissors as your go to for all things arts and crafts, but the cutting tools you’ll be using now are very different. They are knives but not the ones you find in the kitchen.

For cutting all your materials, not just grey board you’ll need a few cutting knives to help you out. The ones that you’ll need the most is the plastic covered Jakar Cutting Knives, they tend to be brightly coloured and they typically have a auto lock function that allows you to have more control when you are cutting. They are mostly available in two sizes and are inexpensive, you can even buy them in a bundle so you don’t have to waste any time looking for them. They come in two different sizes to help you cut materials of various thicknesses. Like pencils, the blade will constantly need to be sharpened. To do this you’ll need to snap off the segment that is blunt to reveal a new sharper end to the knife. It is easier to forget to sharpen the blade but it is important to do so, so that you end with clean cuts of the material you are cutting. You’ll also need to buy replacement blades that are just like the standard blade you get when buying the knives, these usually come in a large pack with enough refills to last you for the year.

Swann Mortan No. 3 with 10 A Blades set
There are also cutting knives more catered for even more precision when modelling small details for your models. The one I particular recommend is getting the Swann Morton blade set no. 3 with 10 A blades. Swann Morton blade is in fact a surgical knife that is very functional with a great set of sharp blades. Unlike the Jakar Cutting Knives I mentioned above, this particular knife comes in different blade numbers each with a different blade shape to cut with. It is a little more expensive however, the flexibility of using various blade heads means you’ll be able to cut in some many ways rather than just in linear motions. One thing to bear in mind is that the blades should be changed just as frequently so that you’ll continuously get clean cuts of your material, as with all knives. The sturdiness of the body allows you to have greater grip when making smaller cuts of material.
Having both these knives ensures that you will always be ready to make models, regardless of there scale and material thickness. They are multi-purpose but as with most knives you’ll need to be cautious as it is easy to cut yourself especially with the Swann Morton knife.
4 . M E T A L R U L E R S
You’ll realise that rulers are simply an essential part of your tool kit. But in particular they come in all shapes and sizes, and materials too. For model making metal rulers are a must - stainless steel to be precise.
They come in wood, plastic and stainless steel is expensive, so why a stainless steel ruler?

A stainless steel ruler is more of an investment for all the models you’ll ever make. They come in varying sizes - from 15cm to 85cm. I’ve collected them over the years. 15cm ruler is portable and fits into your typical pencil case, and the 30cm is great for keeping in your bag along with your sketchbook. As for 85cm, I use it for cutting larger pieces of card into more manageable pieces, acting as a T-square too which is handy for large drawings.
Getting clean and straight cuts of your card (or other material) is important for good looking models. There is little maintenance that needs to happen when you use a metal ruler, the worse thing you can do is scratch the ruler with your knife’s blade, this doesn’t affect you when you cut. However, with rulers other than that of stainless steel you’ll have to be a little cautious as you can accidentally cut the ruler’s surface and not the material itself, leaving you with bumps and crevasses that can lead you to making wonky lines and cuts of your material. You want as much control of your material, and by having other rulers you are prone to making mistakes that could be easily avoided with a ruler that your knife cannot ruin. As for control, what is even better is a stainless steel ruler with a ridge in between, I had one that was 30cm and was great for using when I had to cut material that had more texture and thickness. If it wasn’t for the fact that I lost it during the end of 2nd year I would have still been using it today. It has a heavy duty feel which is great when working with a ruler that won’t bend in your bag, like some of the others I have noticed would .
I have even seen some rulers from friends where it even has scales on them which is even better if you want an all in one ruler, but of course that comes at a price. So generally speaking you want a good quality ruler that will stand the test of time, and is both practical, safe and portable. I hope the ideas I have mentioned above give you a rough idea on what to expect when choosing from all the different rulers that are out there. You’ll be glad to have a metal rulers that mean you won’t have to buy them every year unless you want to upgrade for a shorter or longer ruler than from what you already have in your toolkit.
5. W O O D A D H E S I V E / G L U E

You’ll come across a variations of glue’s to use when working, but when we use grey board in particular it is important to use glue that is durable, transparent and dries fast. It seemed that this wood adhesive from Evo-Stik fell into these three categories.
At some point I used Uhu (pronounced you-who) all purpose glue but because it gets stringy when it is out the tube, making model making that much more messy. Now when I say stringy I mean a little like honey and it gets everywhere if you aren’t careful. It is also difficult to get rid of if it gets on your clothing which I assure you from experience, is not what you want.
Now this particular wood glue from Evo-Stik is found in various sizes which makes it great to carry in your bag on the days you are working on models. I ended buying the large 1 litre and bought the 750ml ones during first year and never have had to buy anymore. I could easily refill and carry when I needed it. The cap has a little nib that open and closes when turned for little amounts of glue to come out. If you don’t clear up this area it will get clogged up. You’ll have to start removing the cap entirely and pouring the glue elsewhere which can be wasteful and inconvenient, as you’ll end up having a lot more glue than you might have wanted. I think as long as you use the container as it is instructed you’ll have enough to last you a lot of model making tasks throughout your degree.

The grey board I would buy in bulk:
1.95mm (almost 2mm): https://www.atlantisart.co.uk/grey-board-1950-microns-a1/
(I usually the 1mm in this store too but, unfortunately they don’t sell it on the online store)
Cutting mat: Double sided cutting mat A0 - A2 + Double sided cutting mat A3 - A5
Cutting Knives: Swann Morton Blade set No. 3 with 5 10A blades (basically refill blades for when you need to change the blade that is already given)
https://www.atlantisart.co.uk/swann-morton-graphic-art-kit/
The two knives together, although I personally just bought the smaller one as I already had a heavy duty one already at the same store (instore that is possible):
https://www.atlantisart.co.uk/jakar-7334-cutter-set/
Blade refills for the smaller one in the two knives pack mentioned above:
https://www.atlantisart.co.uk/jakar-spare-blades-for-jakar-knife-7332/
But if you want to buy them individually online:
Rulers:
30cm + 15cm stainless steel metal ruler kit
30cm triangular scale metal ruler that I would approve (and borrow from my friends):
30cm safety metal ruler (most art stores sell them and they are by far the heaviest but greatest quality you’ll find)
Glue:
cheapest place to buy it:
https://www.screwfix.com/p/evo-stik-wood-adhesive-interior-500ml/59593
An alternative place to buy it online:
https://www.diy.com/departments/evo-stik-wood-adhesive-500ml/36297_BQ.prd